Experiences & Add-ons
Add an experience
Create a new bookable experience and configure its basics, reservation rules, policies, add-ons, and payment behavior.
Before adding an experience
Add an experience when guests need to choose a distinct bookable offer, such as standard seating, a tasting menu, brunch, a workshop, or a seasonal event. Before you start, decide the guest-facing name, description, display price, image, party-size range, notice rules, add-on groups, guest policies, payment requirement, and cancellation terms.
Experiences are configured from Settings / Experiences.
Create the experience
- Open Settings from the left sidebar.
- Select Experiences.
- Choose Add Experience.
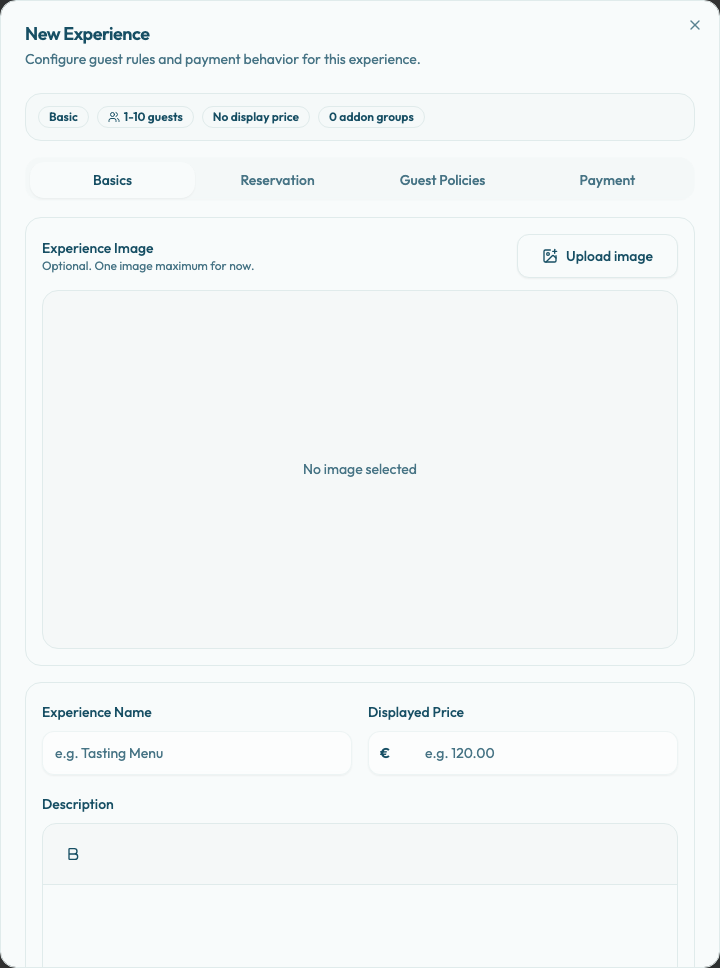
- Start on the Basics tab.
- Upload an experience image if needed. Each experience supports one image.
- Add the Experience Name, Displayed Price, and Description.
- Select any Available Addon Groups that should appear during reservation.
- Continue through Reservation, Guest Policies, and Payment.
- Save the experience.
The experience appears in the list after saving. Keep it active if guests should be able to book it; archived experiences are hidden from public booking flows. The experience must also be included in shift table availability before guests can book it online.
Configure each tab
Use Basics for the content and optional extras guests see while choosing the experience.
- Experience Name: short and clear enough for the public booking page or widget.
- Displayed Price: the price label shown to guests. This is separate from payment collection fields such as deposit amount or prepayment price.
- Description: the guest-facing explanation of what is included.
- Experience Image: optional, one image maximum.
- Available Addon Groups: only selected groups are shown during reservation. Leave all groups unselected to hide add-ons for this experience.
Use Reservation for the rules that decide whether a search can create a booking.
- Min and Max Guests: the party-size range.
- Min and Max Notice: how soon or far ahead guests can book.
- Booking Gap: the buffer Reslify should leave around bookings for this experience.
- Automatically approve reservations: whether eligible reservations become approved instead of requests. Card required experiences must use auto-approve.
Use Guest Policies to decide which restaurant policies apply to this experience. Active guest policies are included by default. Check a policy only when you want to omit it from this experience.
Use Payment to choose how the reservation is financially protected.
- Basic: standard reservation with flexible cancellation terms.
- Card required: can require guests to save a card for late-cancellation or no-show fees. This requires a ready Stripe connected account, country support, auto-approve, and at least one positive fee tier when fees apply.
- Deposit: collect a fixed total or per-guest deposit, optionally only for selected group sizes.
- Prepay: require full upfront payment per guest.
- Optional Prepay: let guests choose pay now or pay at the venue.
Deposit, Prepay, and Optional Prepay use Paid commitment rules. Review the guest-facing cancellation terms preview before saving; guests accept the generated terms during booking, and Reslify stores the accepted version with the reservation.
Launch checklist
Before launch, confirm:
- The public name, description, image, and displayed price are correct.
- The actual payment amount is configured on the Payment tab when money should be collected.
- Party-size, notice, and booking gap rules match operations.
- Add-on groups are selected only where guests should see those add-ons.
- Guest policies are omitted only when this experience should not require them.
- Payment and cancellation settings match what staff will enforce.
- The experience is active.
- At least one shift assigns table availability to the experience.
After saving
Open the public booking page or widget and confirm the experience appears only where it should. Test a party size inside the allowed range and another outside the allowed range. If the experience does not appear, first check whether it is active and whether a bookable shift has tables assigned to it.
For payment-protected experiences, complete a test search through the guest-details step and confirm the correct deposit, prepayment, card requirement, cancellation terms, and guest policies appear before launch.