Experiences & Add-ons
Create and edit digital menus
Create, edit, save, and publish digital menus for the public Reslify portal.
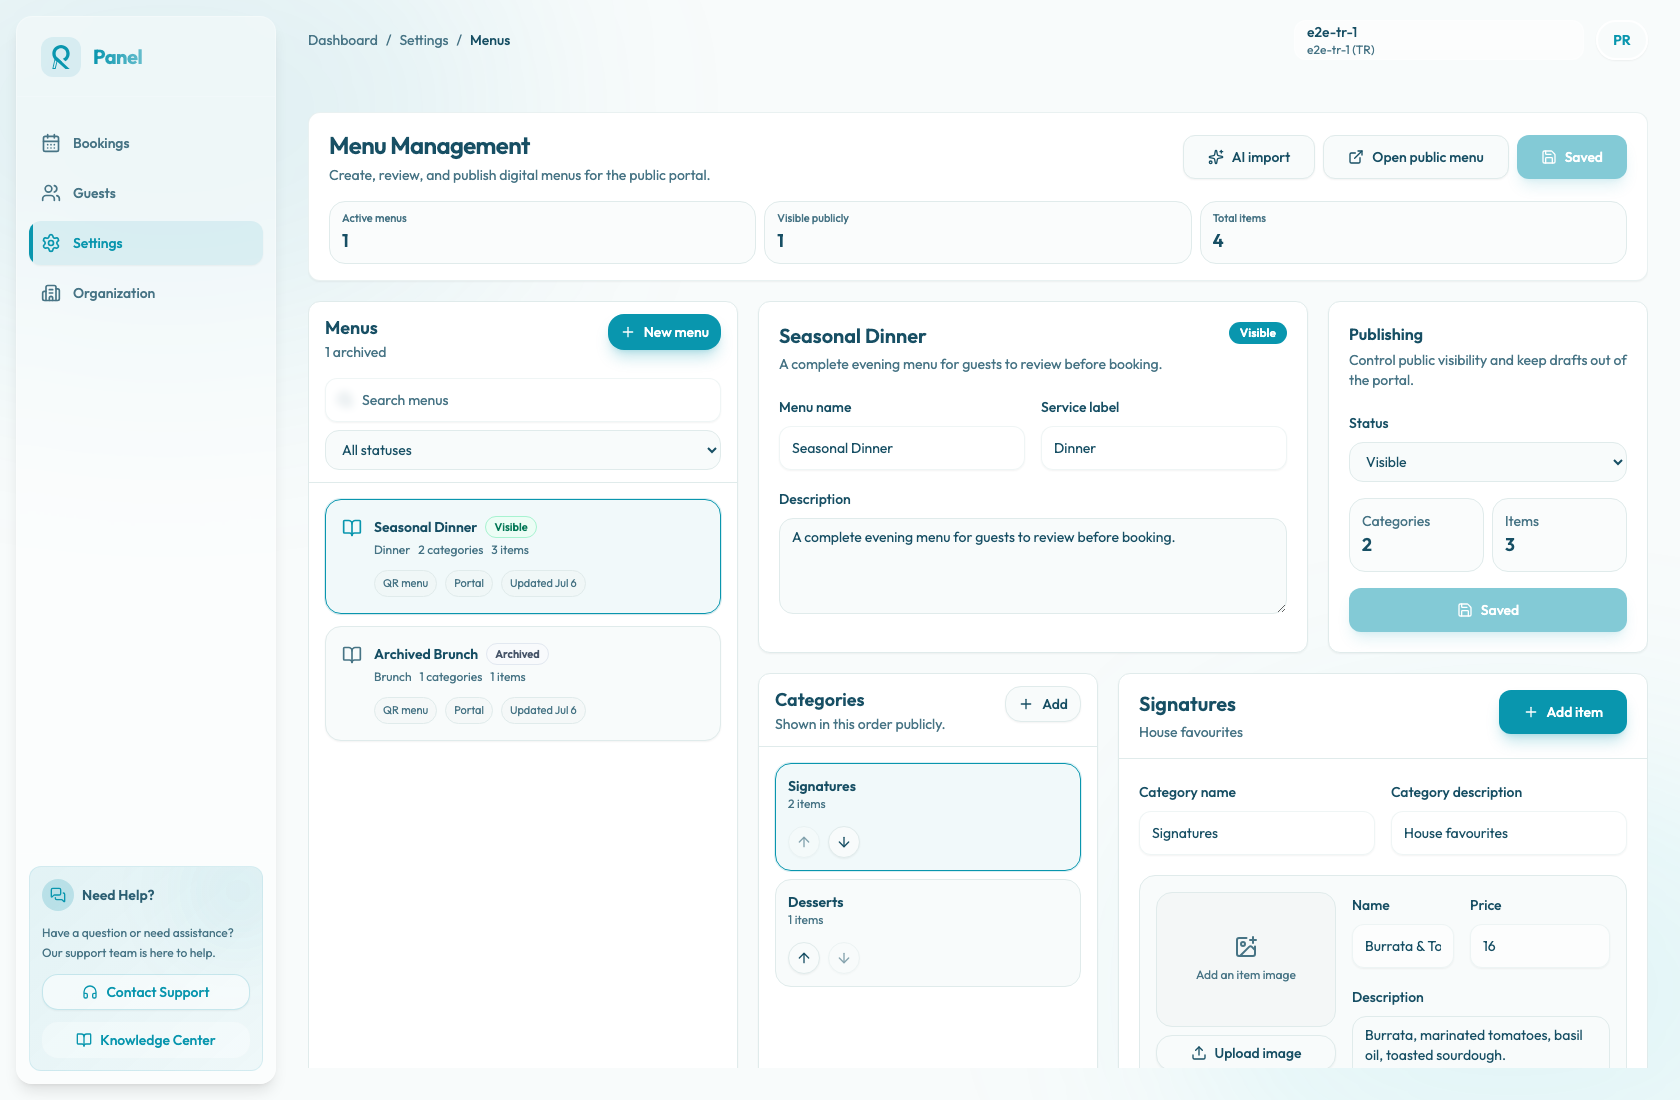
What the menu editor controls
Digital menus power the public Menu page in the Reslify portal. Use Settings / Menus to create menus, set public visibility, organize categories, add items, upload item images, and save the version guests should see.
The editor is called Menu Management in the panel.
Create or select a menu
If the restaurant has no menus yet, choose Create menu. If menus already exist, choose New menu or select a menu from the list.
A new menu is created locally first. It starts as Hidden, uses New Menu as the name, All day as the service label, includes one New Category, and shows an Unsaved badge until you choose Save changes.
Use Search menus and All statuses to find an existing menu. The list includes Visible, Hidden, and Archived menus, and each card shows service label, category count, item count, QR menu, Portal, and last updated date.
Edit menu details and status
Review the menu-level fields:
- Menu name: required. This is the label guests choose in the public menu selector.
- Service label: required. The public menu repeats this above each category, for example "Dinner" or "Brunch".
- Description: public-facing helper text shown near the restaurant name on the menu page.
- Status: controls whether the saved menu can appear publicly.
Use Visible only when the menu is ready for guests. Use Hidden for drafts. Use Archived for old menus that should stay in the panel history but stay out of the public portal.
Build categories
Categories group the items guests browse on the public menu page.
- Select a category card, or choose Add in the Categories panel.
- Fill Category name. This is required before the menu can be saved.
- Fill Category description when guests need context.
- Use the up and down arrow buttons to set the public order.
A Visible menu must have at least one category. Categories can be empty, but an empty public category does not give guests useful content, so add at least one item before treating the menu as live.
Add and edit items
Select a category, then choose Add item or Add first item. Each item can include:
- Name: required.
- Price: entered as a decimal amount, such as
16.00; the saved price must be non-negative. - Description: public-facing ingredient, portion, or preparation details.
- Tags: comma-separated labels such as
Vegetarian, Popular. - Allergens: comma-separated labels. The public menu displays them as Contains ....
- Available: keeps the item on the public menu, but marks it Temporarily unavailable when turned off.
- Featured: can place the item in the featured area when the item is also available and has an image.
- Upload image: accepts PNG, JPEG, or WebP images up to 10 MB, with optional crop before upload.
Use the item up and down arrow buttons to set the order inside the category. Use the trash button to remove an item from the local menu draft before saving.
Each menu can include at most 150 items. If the limit is reached, the editor blocks adding more items and the API rejects oversized menus.
Save changes
The page shows Unsaved changes whenever the local editor differs from the last saved version. The primary save button can show:
- Save changes when there are unsaved local edits
- Saving... while the menu records are being written
- Saved when the editor matches the last saved version
After a successful save, the panel shows Menus saved. If validation fails, the panel shows the API error, such as Menu name is required, Menu service label is required, Category name is required, Menu item name is required, Visible menus must have at least one category, or Menus can include at most 150 items.
Use Open public menu only after the save button returns to Saved. Opening it before saving can show the last saved public version, not the local edits still in the editor.
What guests see
The public portal reads only saved menus with Status set to Visible. Hidden and Archived menus do not appear in the public menu selector, and the public booking page shows the Menu navigation link only when at least one visible menu exists.
On the public menu page, guests can select visible menus, move through category tabs, use Search dishes, open item details, and share items through WhatsApp, Copy link, or SMS. Tags appear as labels, allergens appear as Contains ..., unavailable items stay visible as Temporarily unavailable, and featured items appear only when they are available and have an image.
If no visible menus remain, the booking page no longer links to Menu and the direct menu page shows No public menu is available yet.
Operational checks before publishing
Before setting Status to Visible, confirm:
- The active restaurant in the panel is the restaurant whose portal URL you will share.
- Menu name, Service label, and every Category name and item Name are filled.
- Category and item order match the guest browsing order.
- Prices, currency, tags, allergens, and unavailable labels are intentional.
- Item images have finished uploading and appear in the editor.
- The menu has been saved and the button shows Saved.
- Portal access allows the intended audience to open the public page.
- A guest-style check of
/p/{restaurant-slug}/menushows the expected menu selector, categories, search results, item details, prices, and share actions.