Experiences & Add-ons
Upload menu item images
Upload, replace, and verify menu item images before saving them to the public digital menu.
What images change
Menu item images are managed in Settings > Menus. Select a menu, choose a category, then use the image control on the item card.
Images are optional. When an item has a saved image, guests see it on the public menu item row, in item details, and in the featured-items strip when the item is also Featured and Available. Items without images still appear on the public menu without an image block.
Before you upload
Prepare a PNG, JPEG, or WEBP image up to 10 MB. The panel rejects unsupported file types and files over 10 MB before upload, and the API also rejects empty files, unsupported image MIME types, and files over 10 MB.
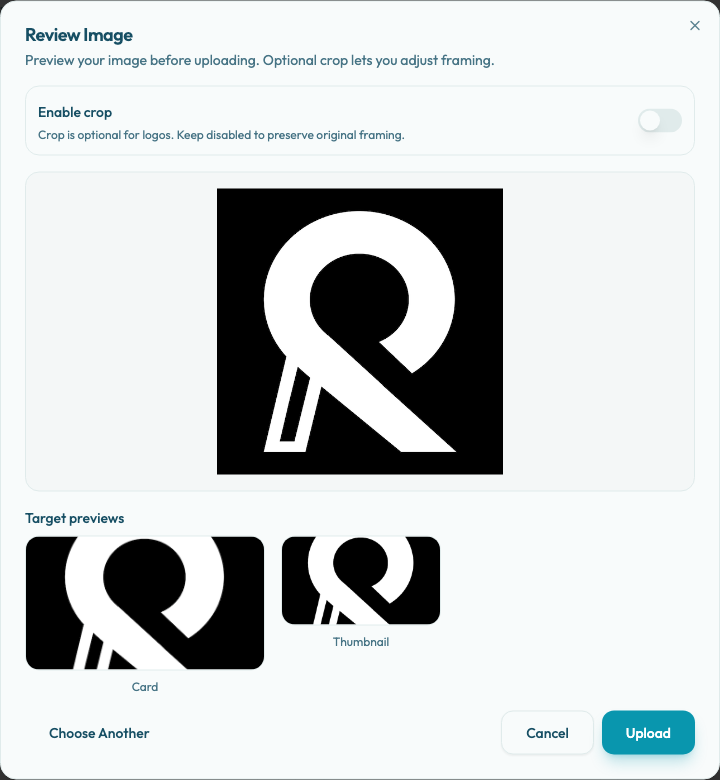
Menu item images use optional freeform cropping. If Enable crop is off, Reslify uses the original frame when creating display variants. If Enable crop is on, use Zoom to adjust the selected frame before upload.
Upload or replace an image
- Open Settings > Menus.
- Select the menu and category.
- Find the item.
- Choose Upload image.
- Select a PNG, JPEG, or WEBP file.
- In Review Image, leave Enable crop off or turn it on and adjust Zoom.
- Check the Card and Thumbnail target previews.
- Choose Upload.
- Wait for Menu item image uploaded.
- Choose Save changes to save the image on the menu.
Uploading another image on the same item replaces the item image after you save the menu. Until Save changes succeeds, the public menu keeps showing the last saved image.
If the wrong file is selected in Review Image, choose Choose Another before uploading. Choose Cancel to close the dialog without changing the item.
Remove behavior
The current menu item editor does not have a separate Remove image action. To change an image, upload a replacement and save the menu. To stop showing the item and its image publicly, delete the item or hide/archive the menu, then save.
Deleting a menu item removes that item from the saved menu. It does not delete the previously uploaded image asset from storage.
Image quality tips
Use clear, well-lit photos that represent the actual dish or drink. Horizontal images close to a 16:9 frame work best because uploaded menu item images are processed into wide web images and thumbnails, then cropped into public menu cards and item details.
Keep the main subject centered. Avoid heavy text overlays, low-resolution images, extreme close-ups that lose context in a thumbnail, or photos that do not match what guests receive.
Check both Card and Thumbnail previews. A photo can look good in one crop but unclear in the other.
Verify after saving
After saving, open Open public menu and check the menu on desktop and mobile. Confirm that:
- The menu status is Visible if guests should see it.
- The image loads in the item row and item detail modal.
- Featured items with images appear correctly when Featured and Available are on.
- The crop keeps the dish recognizable and does not cut off important details.